
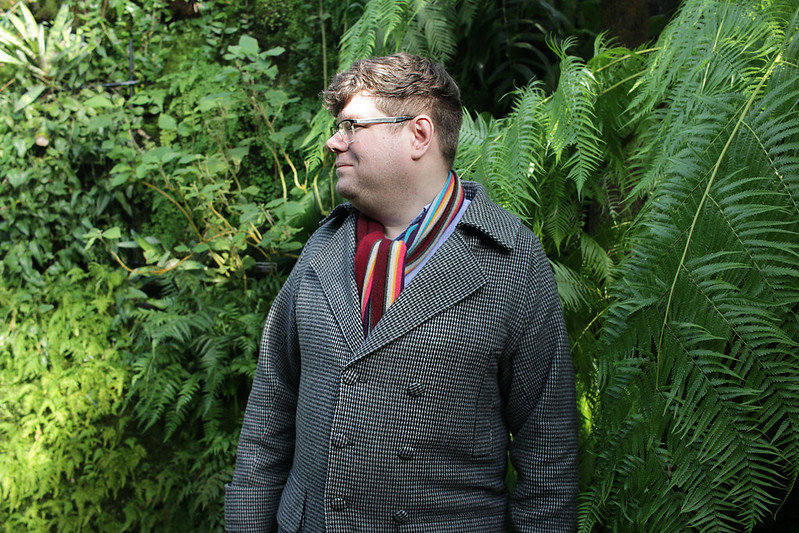
Back in 2015, I made a coat for Phil using Thread Theory’s Goldstream Peacoat pattern. That coat has been fantastic (and I would highly recommend the pattern), but after five years of continual wear it had started to look a little tired lately. Phil began asking for a replacement around a year ago, and I decided that it would be an ideal opportunity to finally try out a pattern from FreeSewing. I love the ethos (and the coding genius) of FreeSewing and support the site as a patron, but was yet to try out a FreeSewing pattern.

If you aren’t familiar with the site, it is community-based, entirely free to use and patterns are generated based on your specific measurements. The FreeSewing pattern I used, the Calton Coat, was released on the site in 2018 and is based on the coat worn by Benedict Cumberbatch in the Sherlock series. It has some really nice details, including a large turned-back cuff, 6 pockets (2 exterior patch, 2 internal patch, 2 welt), and a pleated coat tail.

Due to the nature of FreeSewing (i.e. free and community-based), there aren’t currently any instructions for the Carlton Coat (although there are some for the women’s version, Carlita). Some of the more unusual pattern pieces did bamboozle me slightly, but the pattern’s designers Joost and Anneke kindly helped out when I got stuck! I was planning to write up a detailed tutorial for the construction process, but due to having a one year break in the middle I’m afraid that I don’t remember it well enough.

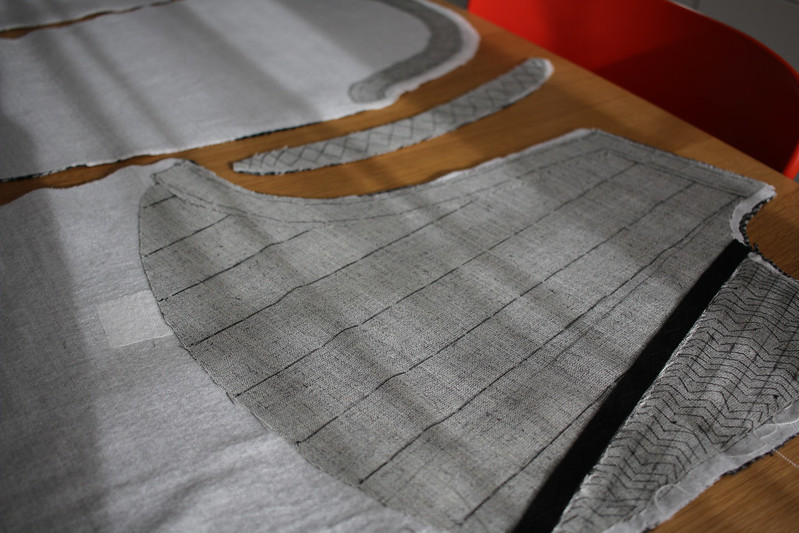
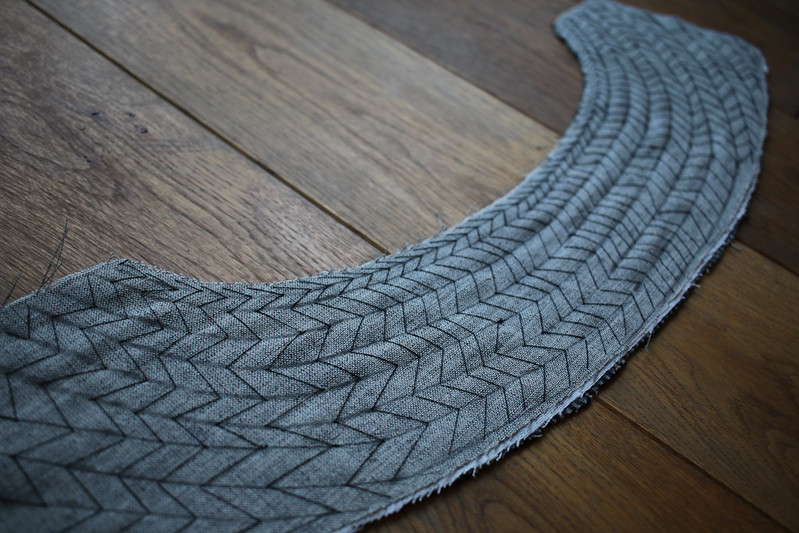
FreeSewing can generate PDF pattern files in A0 format (yippee), so I sent the pattern pieces off for printing and began making this coat roughly a year ago. The main fabric is a wool blend from Barry’s Fabrics here in Birmingham, and the lining is a Liberty cotton purchased from the “Liberty Man” (The Little World of Fabric) in Birmingham Rag Market. I interfaced pretty much every piece of this coat using a coat weight interfacing from the English Couture Company. It’s a great quality interfacing – I’ve seen similar inside RTW outerwear that I’ve refashioned. I used a hair canvas to stablise key areas of the coat (as shown in some of the construction photos above and below), and referred to an old tailoring blog series from Gertie when pad stitching the lapel and under collar. While on the subject of tutorials, I referred to this Thread Theory tutorial when constructing the welt pockets.

I didn’t make a toile for this coat, and I spent ages on alterations as a result. When sewing for myself, I can almost always get away without sewing a toile, tweaking the fit of a garment until I’m happy with it. I shouldn’t assume that I can get away with the same when sewing for others. I also think that it’s a good idea to always toile a pattern, such as this one, which is generated based on the size information you input. The fit of the version you sew isn’t going to be the same as anyone else’s, and it’s always possible that you could have made an error in the sizing information input.


I originally set myself an arbitrary deadline to get this coat ready for Phil to wear during a trip to New York in March 2019. I had long enough to finish it if, and only if, there were no fit issues. Of course, there were fit issues, so Phil carried on wearing his Goldstream Peacoat. With the weather warming up, I then put aside the in-progress Carlton Coat until the start of this year.


As first sewn, the coat was generally too large, particularly around the armholes and sleeves. I reduced the length of the sleeves (I didn’t want to mess with the cuffs so took height off at the sleeve caps), narrowed the width of the shoulders, narrowed the sleeves, and raised the armholes (adding in underarm gussetts). I also reduced the length of the coat, and took in the coat at the side seams (which meant needing to detach and reattach the exterior patch pockets). My approach to the alterations was to trust my assumptions on what needed to change and to cut into the coat. It could have backfired, and at one point I did think I had made the coat too small, but the extra effort to get the fit right for Phil (admittedly retrospectively rather than via a toile…) has paid off in a successful coat which I’m sure he’ll get loads of wear out of.


Phil has worn the coat daily since I completed it, and has reported back that the (Prym) covered buttons (used in two sizes, on the front and back of the coat) are not very sturdy. Two covered buttons have already been lost, partially (I think) because Phil is hard on his clothing, and partially because the metal loops used to attach the buttons to the coat are thin. I’m planning to swap the covered buttons for standard buttons, ideally before any more are jettisoned. Phil has also requested an additional button lower down on the coat, claiming that the current button positions left him with a cold belly button while we were walking around cold New York!